Creating a Résumé in Doom
Crafting an effective Résumé#
My current résumé looks professional and lays out all the information I need to convey to potential employers. I made it with a LaTeX template that I’ve modified over the years to suit my needs. This format allows me to comment out information like employers from years ago that I don’t want to include, skills that aren’t relevant, and of course it’s on github, so I’m not trying to remember what some bullet point used to say, or sifting through 10 versions of the same document.
But we’re not here to talk about that. This is about a DOOM résumé, whatever that hell that is. It does none of the above. It’s built into a DOOM WAD file. It is absurdly difficult to edit, requires constant testing while developing, installing programs, knowledge of the command line, and oh… there are monsters trying to kill you while you try to learn where I was working from 2017 to 2021, so it’s not easy to read either.
Creating a Map#
Euerka#
Eureka was the first map making tool that I found. I found a tutorial on youtube that made it look somewhat easy, so I went with it. You can toggle between a few different modes, that let you add rooms, monsters, objects and edit walls, textures, ceilings, as well as adding room effects.
Doors#
Luckily there have been some updates on doors since the videos on youtube had been released. It was now as easy as highlighting the lines I needed to make into a door, hitting the “Gen” button, and selecting “door”. The first door I made, before I knew about this option, took far too long to make and had a few pitfalls since it’s so easy to accidentally click something in the environment and edit another wall you didn’t intend to. The same tools are available for a few other features that would normally take a lot more time to make, such as stairs.
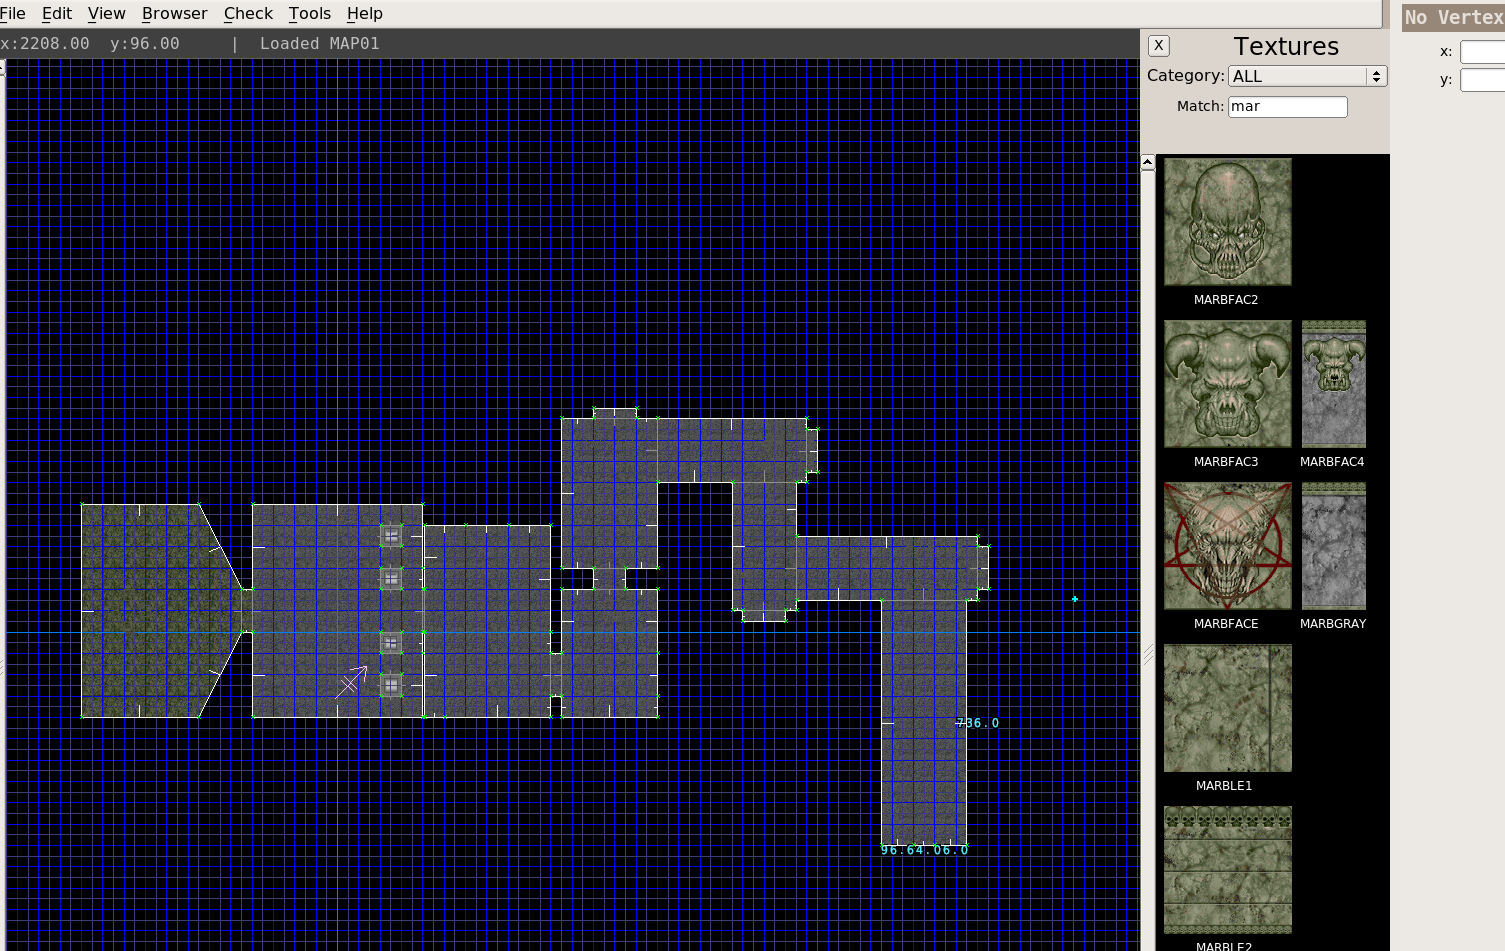
Adding Textures#
The only way I could think of adding my resume info, was to throw the information up on the walls as you go through the level. Unfortunately, adding textures required a completely different program. Although Eureka had great tools for building maps and setting objects down in your map, it didn’t seem to have any way of easily adding textures or files. In comes Slade. This editor allows you to edit, add, and remove the files inside of the WAD.
It does however, require a lot of steps:
- Open Slade, and open the base DOOM WAD
- There’s a bug in Slade so open any image file, THEN open the textures file otherwise Slade will crash
- Find the texture you want to edit and export the image to somewhere we can find it.
- Edit the image in Krita
- Go back into Slade, and import the texture into the WAD I’m editing
- Convert the file to a DOOM graphics file
- Add the file to the Patch table
- Add the file to the TextureX
You can see a sample of how the texture looks here (This is the actual size):
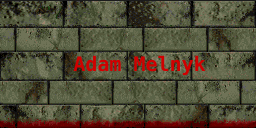
The end result of after it’s been added:
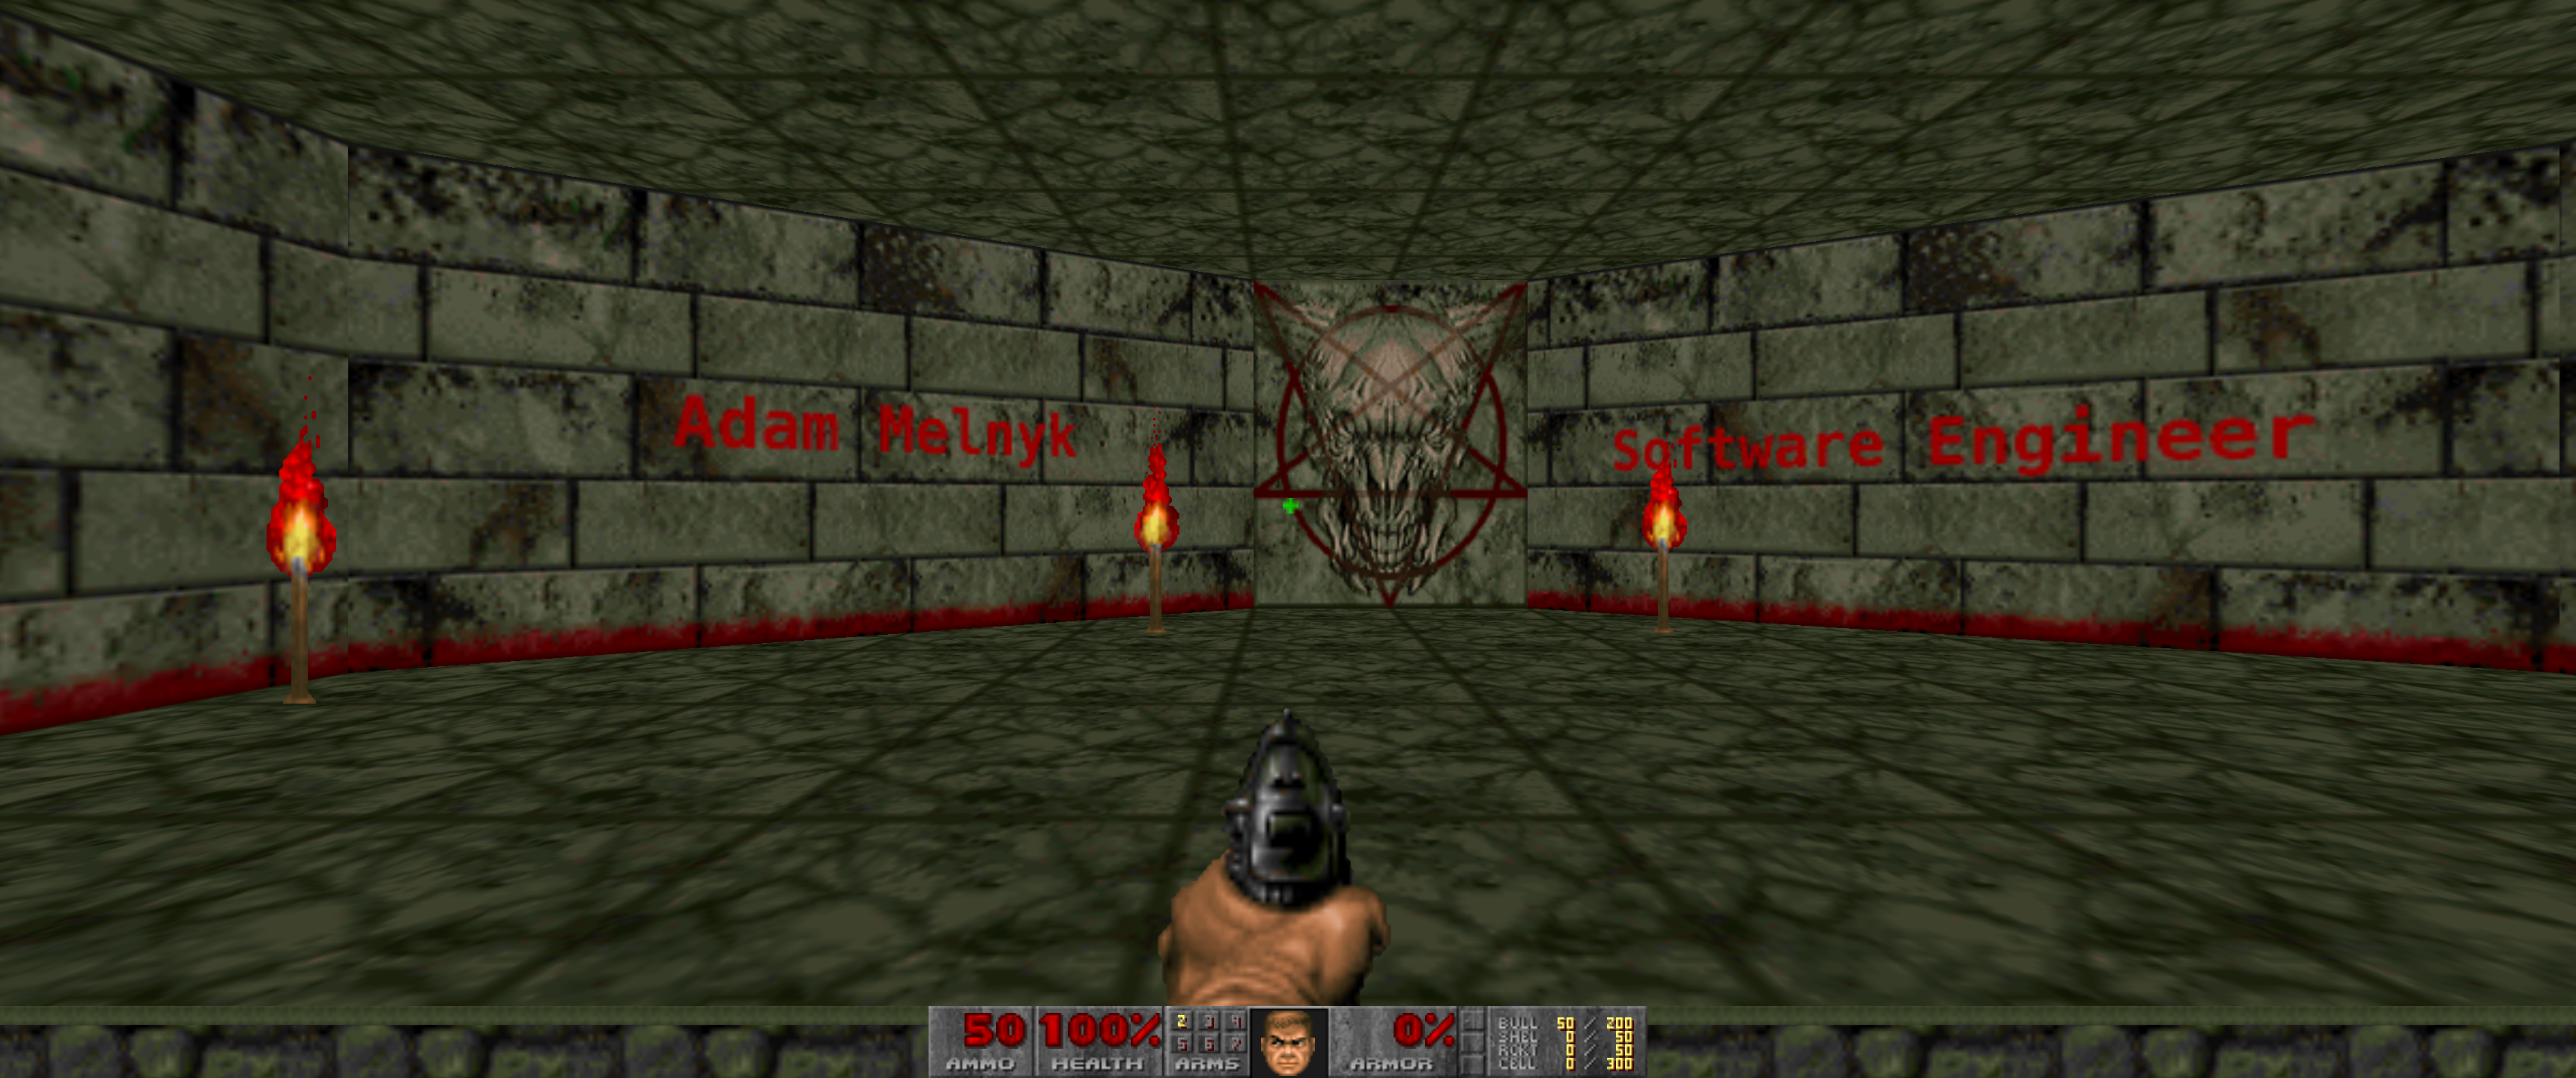
There are limitations to this as well. To avoid the tutti-frutti effect, it is easiest to just edit existing textures so we won’t make a mistake making them in a size that doesn’t work well.
This part took by far, the longest. Creating textures, importing, converting et al. took longer than I would have expected. I have a lot of respect for the people who are still making doom mods in 2022, this is a ton of work.
Laying out the level#
The idea behind this was primarily to play DOOM while somehow displaying my résumé. So I needed to lay out the level in a way that the user is forced to see the info I put on the wall. I can say that I know almost nothing about level design so the best way I could think to do this is to put monsters where I want the user to look.
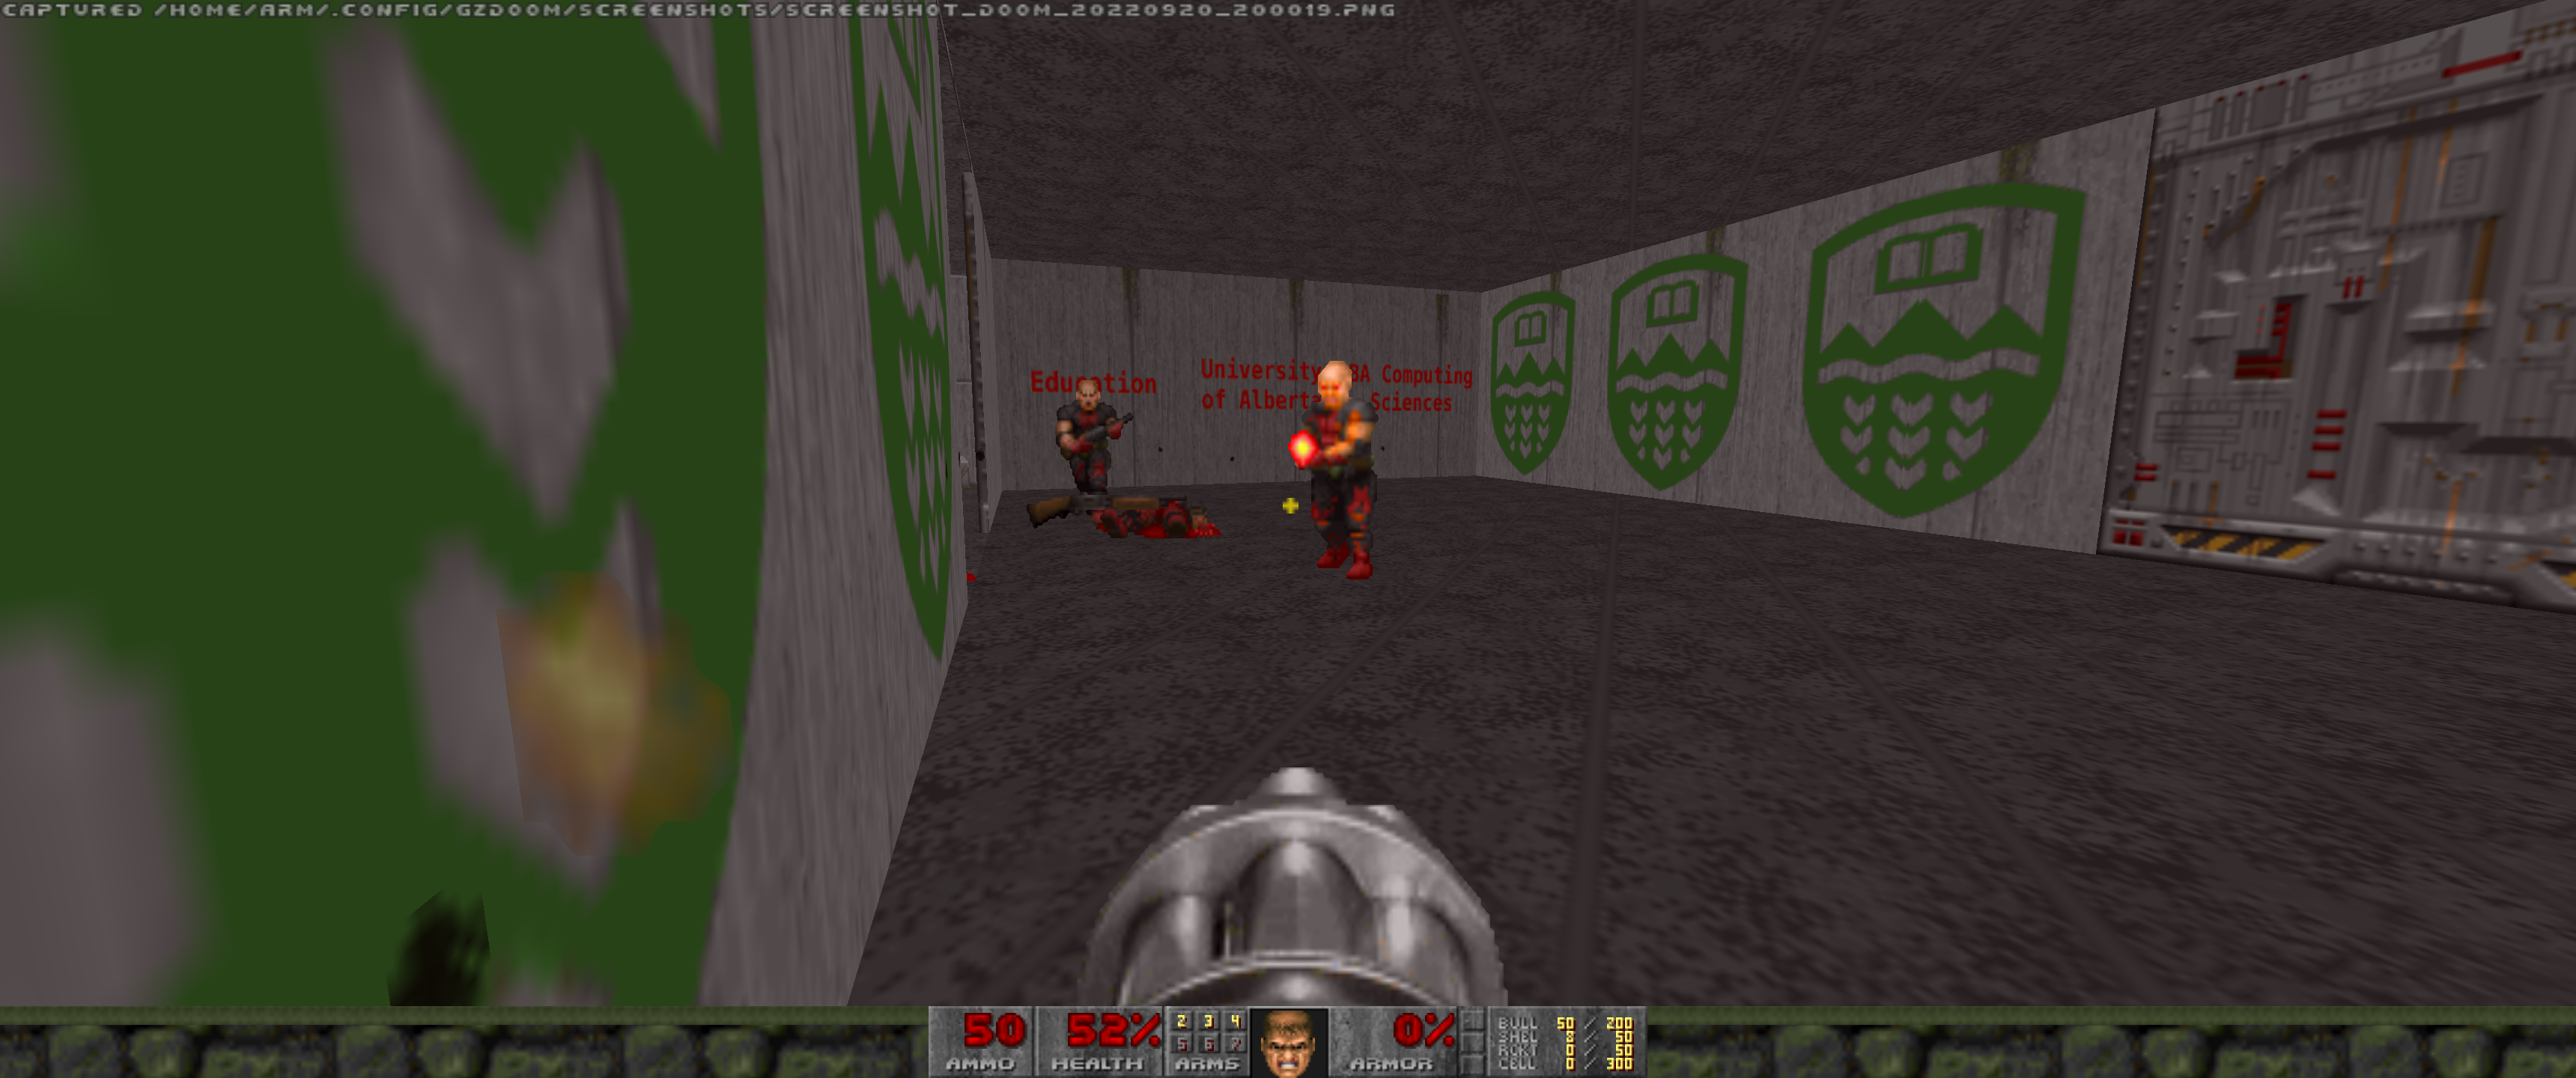
Perfect, the user faces towards the monsters when they start shooting, and they’re forced to see where I went to school and what I studied. Now all that’s needed to to keep adding more rooms, and with it, more information from my résumé.
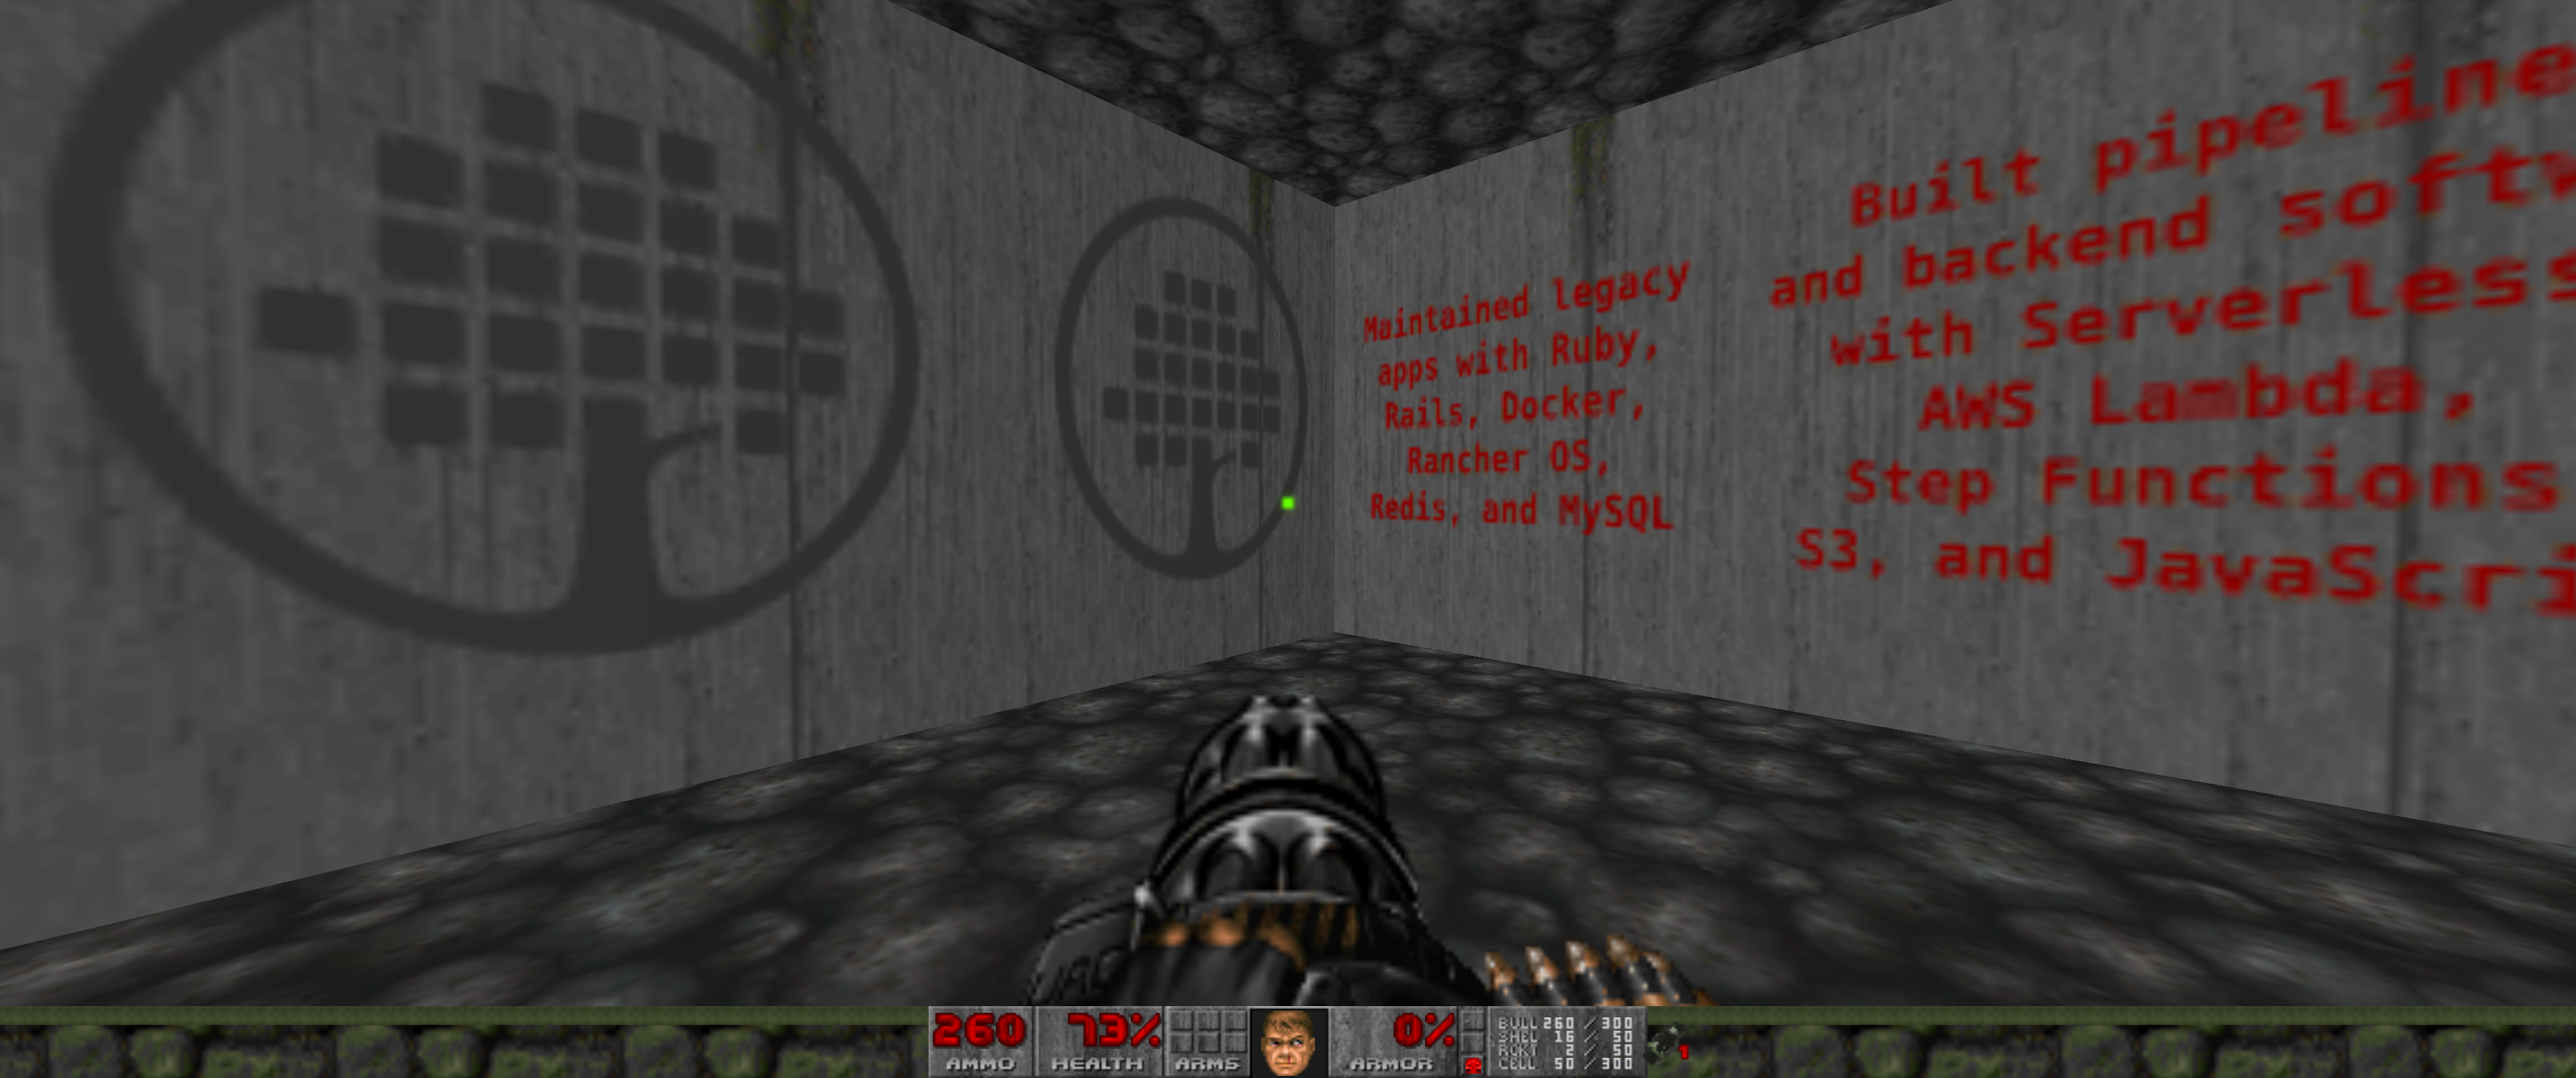
Showing off my experience#
I need a novel way of showing off my experience, ideally something that takes advantage of it being part of DOOM but, plastering the projects that I’ve worked on all over the walls alone isn’t going to cut it. It wouldn’t be DOOM if there wasn’t a secret room somewhere so that’s exactly how I’m going show this information.
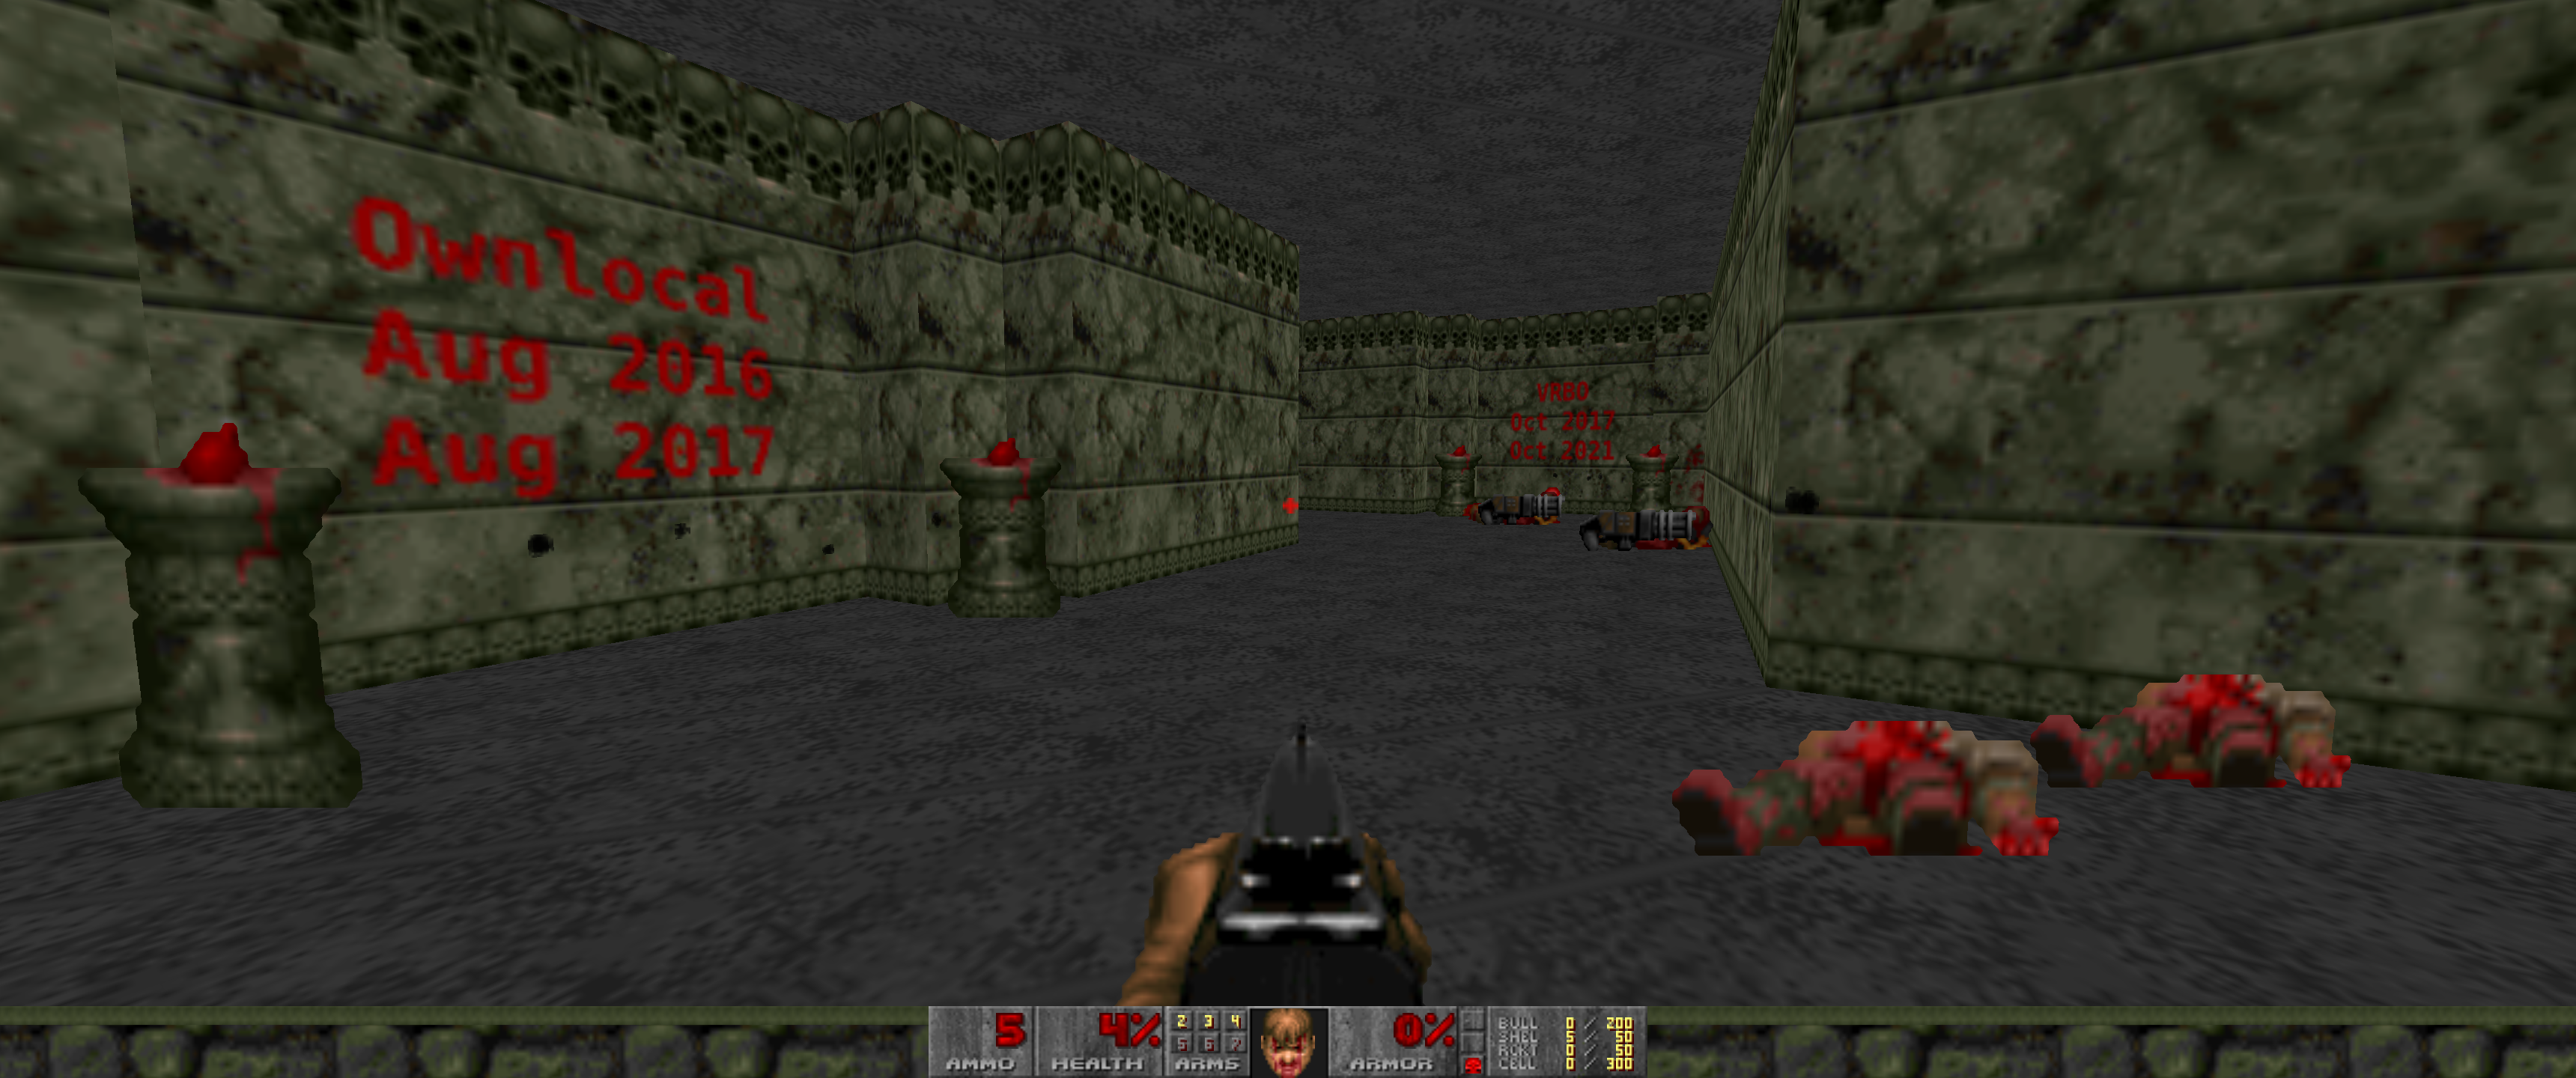
Here you can see the startup I worked at in 2016 and 2017, but walk through the wall and…
You’re greeted with some of the things I worked on and the company logo. We can even use Eureka to make this sector “secret”, which means when we walk into into the room it should let us know that we’ve discovered a secret!
Ending the Level#
If you want to avoid spoilers for… my résumé, you may want to leave and play the level before reading further.
One of my favorite endings of DOOM was the end of DOOM Zero, where you walk into a coffin only to be crushed. Luckily, Eureka came with the right tools to do exactly this. You can set an area to give damage and then exit, this combined with using “gen” to make a hallway into a crusher, I had my ending. the player walks down a hallway towards a Skull button, only to be crushed by hallway before they can reach it.
Want to see my actual résumé?#
You can find it here
Just want to watch?#
I took a quick screen capture of the level er… résumé. You can watch it here
Or are you ready to play?#
You can find the rest of the info you need here.